Contents
- § Creating cdnnow! account
- § WordPress plugins
- § How to check if files are loading via CDN?
- § Image optimization settings
- § Costs of CDN service
It is recommended to make a backup of your CMS before starting the integration.
Submit a request for CDN connection or contact us in the chat, specifying your email, website, and CMS. Our manager will create an account for you in your cdnnow! account and set up your project. You will receive an email with instructions and the address of your project on the cdnnow network.
You've got your CDN address as userXXXXX.nowcdn.co.
Log in to your Wordpress admin panel.
To connect a CDN to WordPress, you'll need to install a plugin. There are many CDN plugins available, we can recommend the following.: CDN Enabler, LiteSpeed Cache. Below we'll review them in details.
W3 Total cache plugin recently disabled the possibility
to connect third-party CDN services
WP Fastest Cache is a good plugin to
speed up your site, but for this you need to change some settings in you personal account cdnnow!.
If you choose to use WP Fastest Cache, please contact our support team,
we'll come with advices on proper configuration.
CDN Enabler
Plugin can be found here: https://ru.wordpress.org/plugins/cdn-enabler/
Author: KeyCDN
Pros: free, very simple CDN setup, nothing extra.
Installation and configuration
In your Wordpress admin panel navigate to «Plugins → Add new» and enter «CDN Enabler» to the search field.
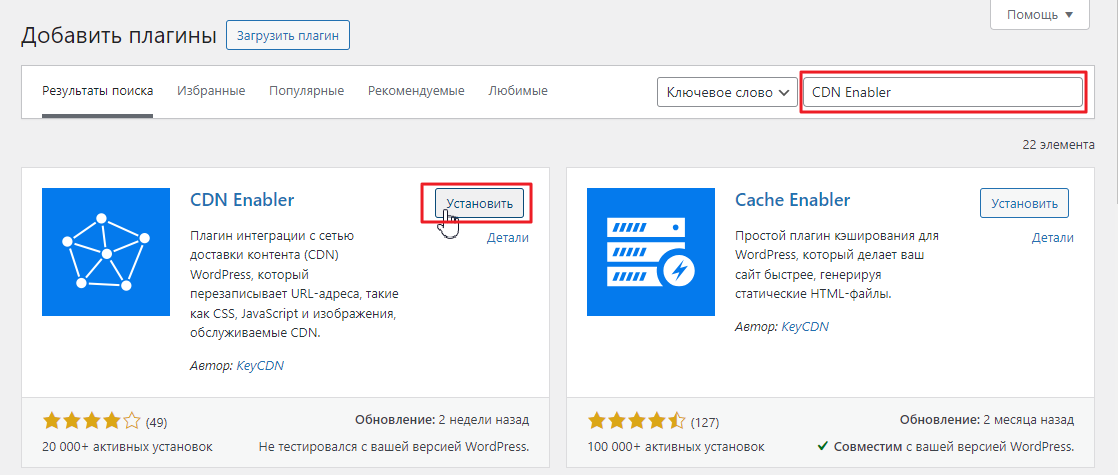
Click «Install», and then — «Activate».
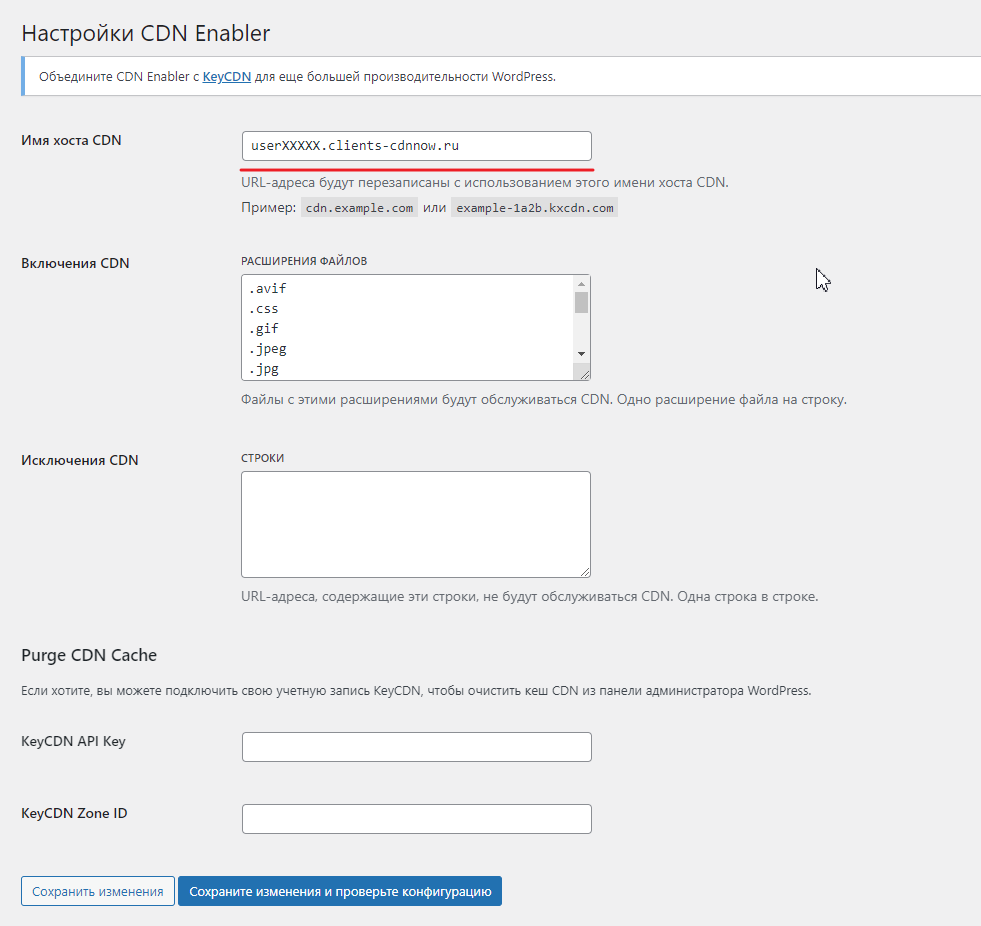
After activation navigate to «Plugins → Installed» section, then click Settings/Configuration on this plugin.
The configuration is very simple — only one field «CDN host name» should be filled with the address, we you received from us userXXXXX.nowcdn.co (where ХХХХХ is your unique name).
Attention! Please provide the address without the protocol (http/https).
Instead of service domain userXXXXX.nowcdn.co you may use your own domain for CDN. Please check our artice for details.
All the main file extensions for caching are already added to the "CDN Inclusions" field.
If you want to add another extension to the list, be sure to check your cdnnow! Personal Account
and verify that the extension is cached by the CDN.
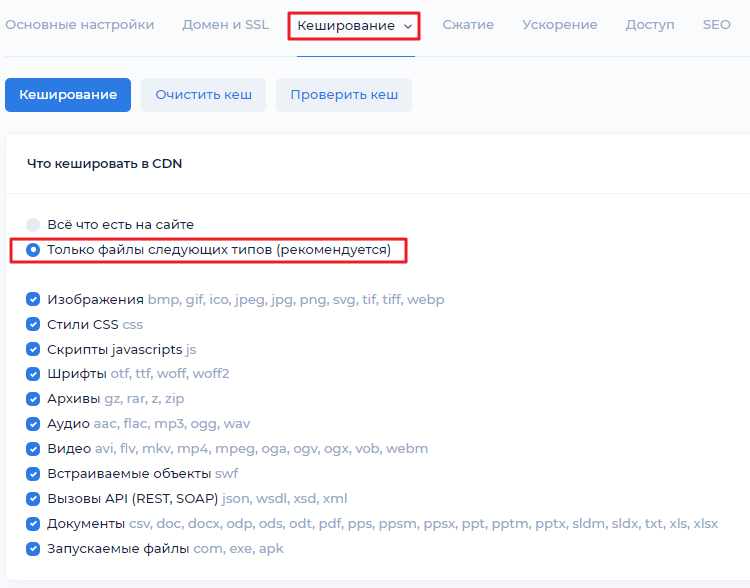
You can do this in your project settings, under the "Caching" tab. There's a list of file
types to cache. If the extension you need isn't there, —
contact our support team, we'll add them.
If you want to exclude certain extensions from caching, you need to do so in two places:
- In your cdnnow! account, on the Caching tab of your project settings, uncheck the box for a specific file type, save and publish the project.
- In the CDN Enabler plugin, remove that file type from the "CDN Enables" list, and save the changes.
The remaining plugin fields can be left blank.
To save your changes, click "Save Changes."
When using the "Save Changes and Test Configuration" button, you may receive an error stating that the CDN URL is unavailable (404). This is normal behavior. Simply use the "Save Changes" option without checking the configuration.
After saving, go to your site, refresh the page, and check that it displays correctly.
We wrote how to verify that files are now loading through the CDN at the end of the article.
LiteSpeed Cache
Link to the plugin page: https://wordpress.org/plugins/litespeed-cache/
Author: LiteSpeed Technologies
Advantages: Free, over 5 million installations, numerous caching and speed optimization settings.
Installation and configuration
In your WordPress admin panel, go to the "Plugins → Add New" menu and enter "LiteSpeed Cache" in the search field.
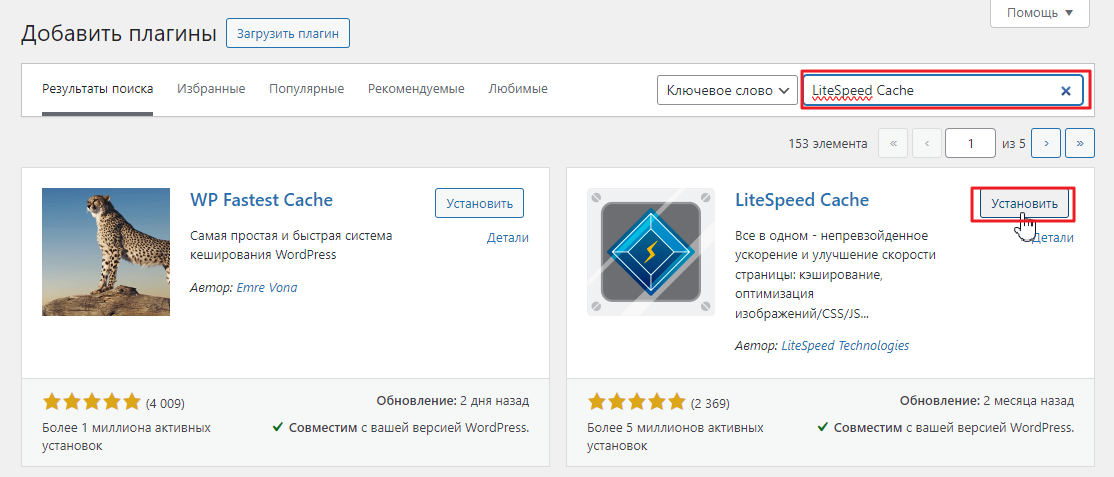
Click “Install” for the plugin, and when installed, click “Activate”.
When activated, go to the "Plugins → Installed" section, where you should click the Settings/Configuration link for this plugin.
This plugin's capabilities are extensive. We won't cover other plugin settings,we'd better concentrate on how to connect to our CDN service.
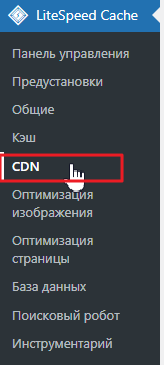
To connect to the CDN, you need to go to the plugin menu in the WP side menu, then to the CDN item.
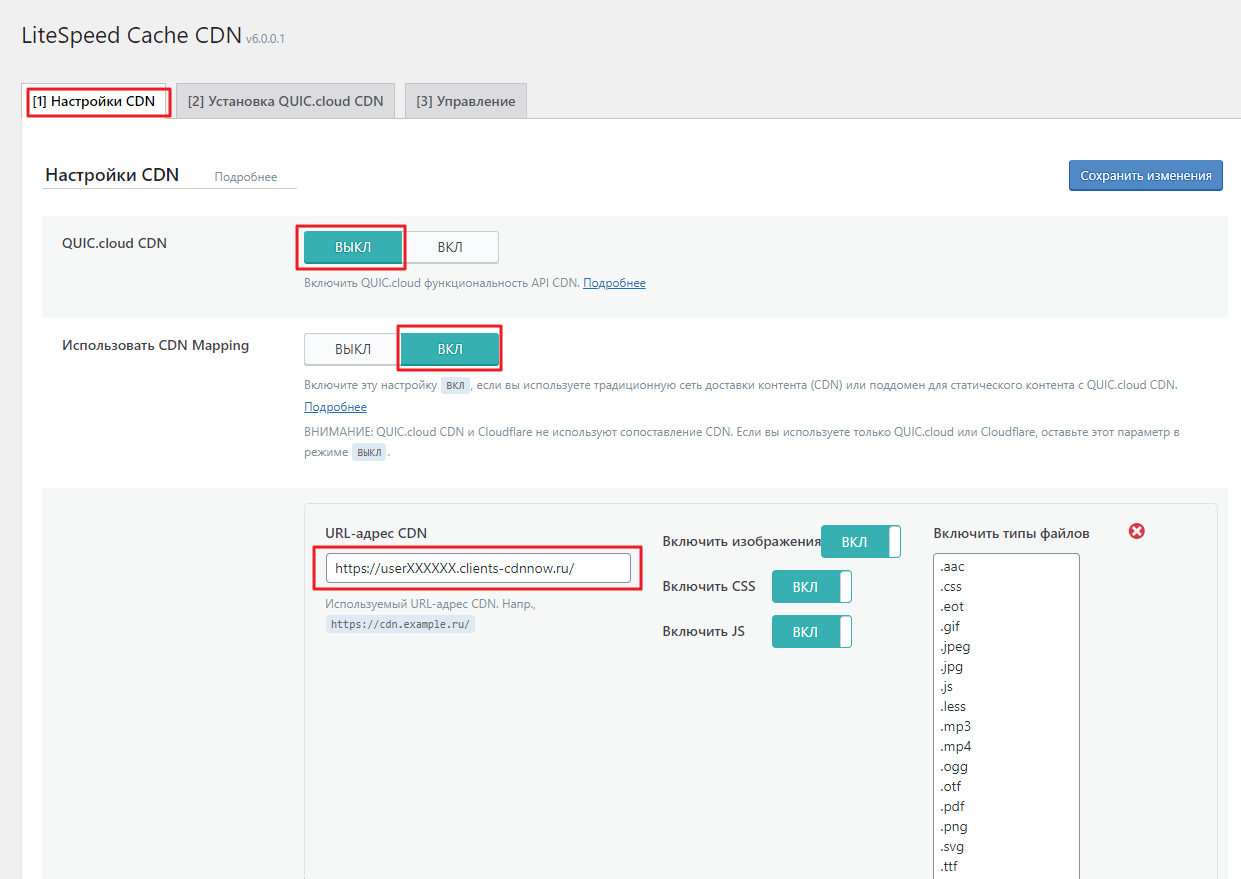
In the CDN settings tab, you need to:
1. The first switch should be OFF, and the second one ON (Use CDN Mapping).
2. In the "CDN URL" field, enter your CDN service domain with the https protocol
(or your configured CDN domain, such as https://cdn.example.com, where example.com is your website's primary domain).
Instead of the service domain userXXXXX.nowcdn.co, you can use your own domain for the CDN. For instructions on setting it up, read our article.
On the right side of the settings page, the file types for caching are filled in.
If you want to add a different extension to the list, be sure to check your cdnnow!
Personal Account and ensure that the extension is cached in the CDN.
You can do this in your project settings, under the "Caching" tab.
There you'll find a list of file types to cache. If the extension you
need isn't listed,
contact support, and we'll add it.
Если же вы хотите исключить какие-то расширения из кеширования, вам нужно это сделать в двух местах:
- в личном кабинете cdnnow! на вкладке Кеширования настроек вашего проекта снимите галку у определенного типа файлов, сохраните и опубликуйте проект,
- в плагине уберите из списка «включить типы файлов» этот тип, сохраните изменения.
Остальные настройки можно оставить как есть.
Для сохранения изменений, нажмите «Сохранить изменения».
После сохранения, перейдите на ваш сайт, обновите страницу и проверьте, что она отображается
корректно.
Как проверить, что файлы теперь загружаются через CDN, мы написали в
конце статьи.
Как проверить, что файлы стали загружаться через CDN?
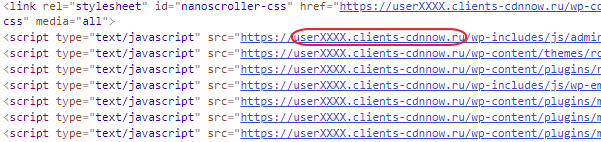
Откройте ваш сайт и откройте панель разработчика (F12).
В панели Elements (Элементы/Инспектор) можно увидеть код сайта. В нем файлы, такие как скрипты, стили CSS, изображения должны поменять свои адреса на новые, начинающиеся с домена CDN.
Посетитель вашего сайта будет получать эти файлы из нашей сети — с ближайшего к нему сервера.
На этом настройка завершена и CDN готов к использованию.
- ваш сайт без CMS;
- или для вашей CMS нет модуля для подключения CDN, но вы можете настроить сайт вручную;
- у вас есть доступ до исходного кода вашего сайта и вы можете изменять его.
Подключите через CDN те ресурсы, которые меняются не часто, но часто запрашиваются: изображения, скрипты Javascript, стили CSS. Посетитель вашего сайта получит закешированные статичные файлы с ближайшего к нему сервера в сети CDN с максимальной скоростью. Сервис cdnnow! может сжимать кешируемые js и css файлы с помощью gzip и brotli, что уменьшает их вес.
Изображения можно сконвертировать «на лету» в тип webp без потери качества, что может дать до 50% сжатия веса картинок в браузере.
Настройка оптимизации изображений
Мы написали подробную статью про достоинства сервиса оптимизации изображений. Здесь опишем, как подключить эту опцию в вашем проекте.
Перейдите в личном кабинете selfcare.cdnnow.pro в вашем проекте на вкладку «Ускорение».
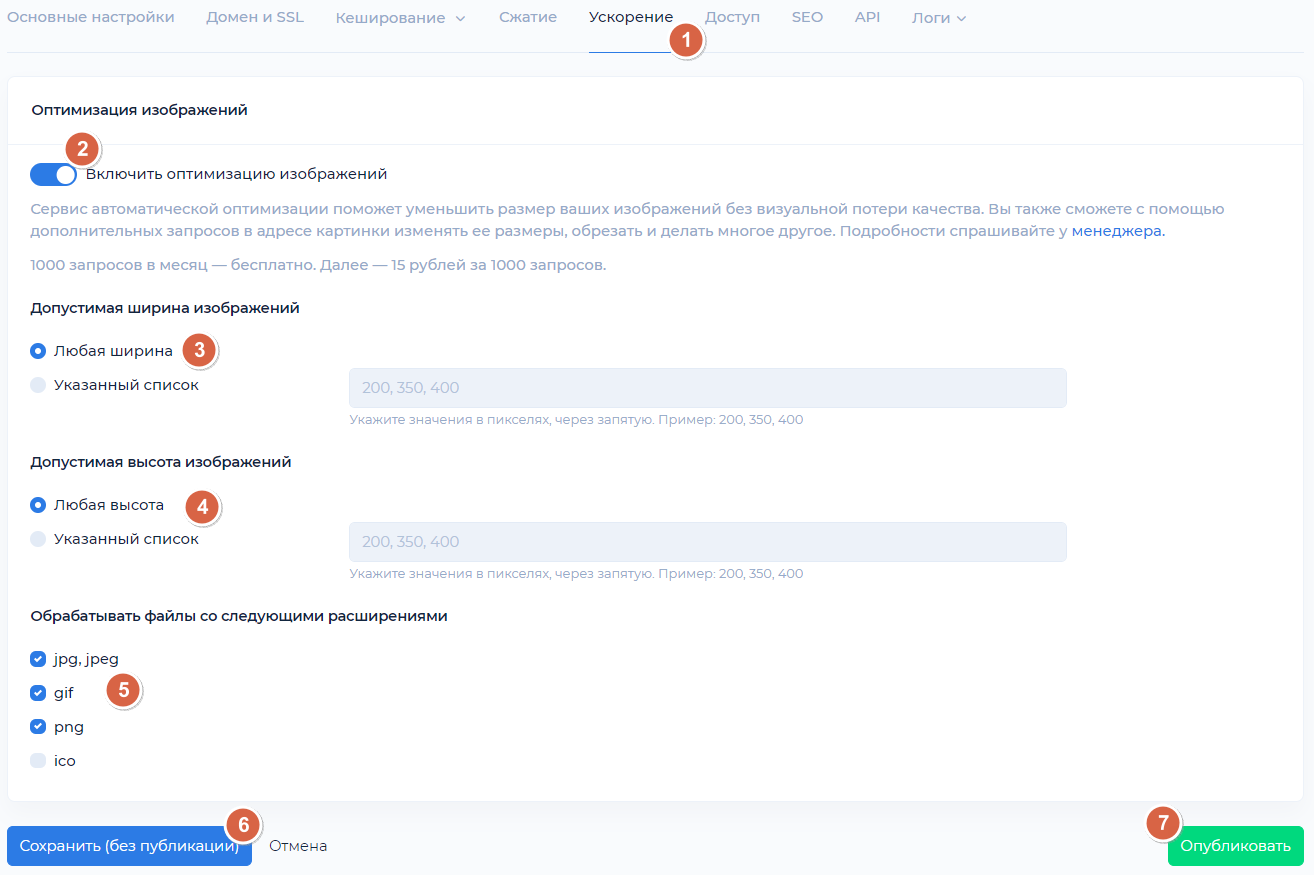
Включите функцию оптимизации изображений.
Если вы не знаете все размеры изображений на вашем сайте, оставьте параметры «Любая ширина» и «Любая высота».
Если вам известны размеры ваших изображений, вы можете указать соответствующие параметры в полях. Оптимизация будет происходить только для этих размеров (п. 3 и 4 на рисунке).
Выберите расширения изображений (п.5), которые вы хотите оптимизировать на своем сайте. Файлы .ico не стоит оптимизировать, если они содержат прозрачность.
Сохраните (п.6) и опубликуйте (п.7) проект.
После публикации проекта ваши изображения на сайте станут загружаться еще быстрее за счет преобразования «на лету» в тип webp. При этом расширения картинок останутся прежними. Размер изображения (в байтах) уменьшится при неизменном качестве.
Стоимость услуг CDN
Мы предоставляем всем клиентам бесплатный тестовый период 7 дней. При получении доступа в личный кабинет вы также получаете неограниченный доступ к функциям CDN и оптимизации изображений. Во время бесплатного периода вы можете полноценно протестировать скорость загрузки, мы не ограничиваем функционал для тестовых аккаунтов.
Если вам понравился наш сервис и вы готовы к долговременному сотрудничеству, мы переведем ваш аккаунт из тестового в основной.
Стоимость размещения данных в CDN зависит от объема трафика. Вы можете посмотреть в личном кабинете в разделе «Статистика» объем трафика на тестовом периоде и рассчитать, сколько трафика ожидается за месяц. В том же разделе вы можете увидеть объемы запросов по оптимизации изображений, если вы включали эту функцию.
Тарифы
Starting at $8/month — includes
1000 GB. Unlimited projects
Minimum monthly prepayment of $8. Includes 1000 GB of traffic.
Excess usage is billed postpaid on a tiered pricing model. Enter your monthly traffic volume in gigabytes.
Each plan includes up to 100 000 optimization requests per month
then $1.12 / 10 000 requests
If you have any questions about setup, maintenance, or pricing, you can always contact our support team:
- Email: sales@cdnnow.pro
- The chat at the bottom of the page
- Phone:
8 (800) 600-67-88 (weekdays, 10:00-19:00 Moscow Time)